Winter Coffee Stoves: Temperature Precision
By Amina Al-Khalil • 23rd Mar
Winter camps demand more than a simple stove, they demand precision. Cold weather coffee brewing and stove coffee temperature control separate a steady morning ritual from a frustrating scramble for hot caffeine in subzero darkness. Temperature stability is not a luxury; it's the backbone of reliable extraction in conditions where your equipment, fuel, and water all conspire to cool faster than you can heat.
When thermometers drop below freezing, every BTU becomes accountable. Water loses thermal energy to the air, your burner fights back harder, regulator pressure fluctuates, and your brewing window narrows. The stoves and techniques that work in spring fail predictably in January. This guide cuts through the noise and shows you how to build a coffee simmer stability system that performs in winter (one grounded in temperature science, field-tested in cold, and designed to be serviced in camp when the inevitable happens).
The Winter Problem: Why Temperature Control Fails in Cold
Coffee extraction is a chemistry problem, not a guessing game. For coffee-specific stove metrics, see our camp coffee temperature precision tests. The Specialty Coffee Association confirms that optimal brewing sits between 195-205°F (90-96°C)[1][5]. This narrow band extracts solubles evenly (acids, sugars, oils) that make coffee taste bright, balanced, and full. Too cool (below 195°F), and extraction stalls; the cup tastes weak, sour, or grassy[6]. Too hot, and you over-extract bitterness[1].
In winter, three forces undermine that precision:
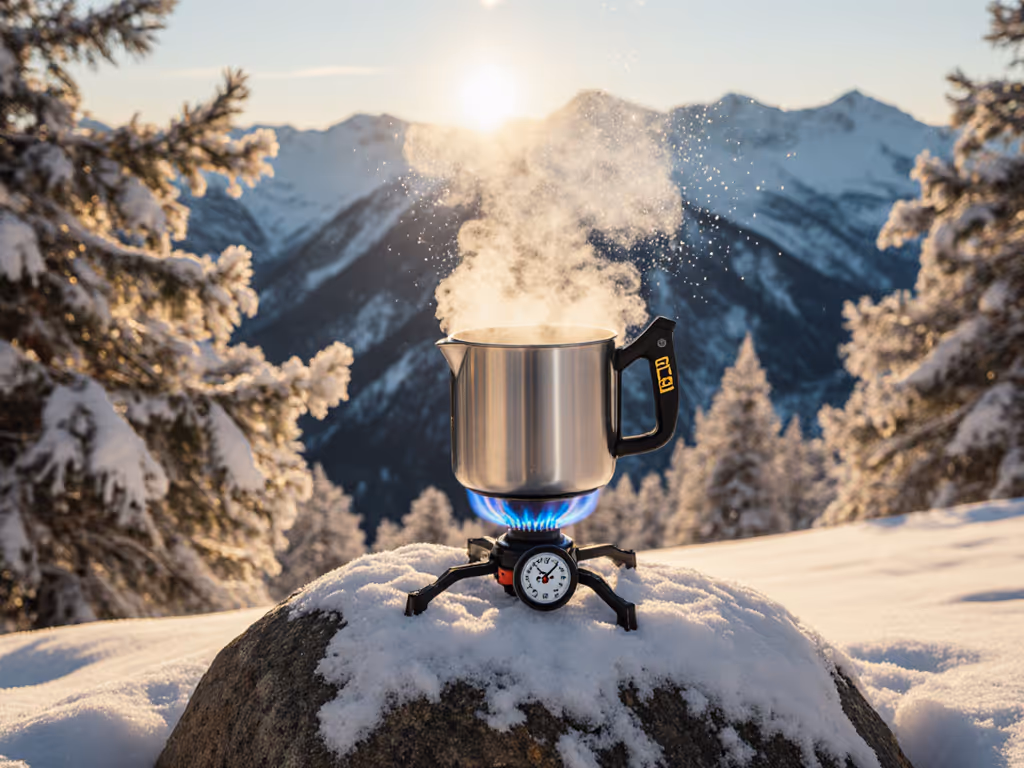
Regulator freeze: Butane-blend canisters suffer pressure loss as ambient temperature drops. Understand how pressure regulators stabilize performance across temperatures. A canister at 32°F delivers 40-50% less energy than at 70°F[2]. Propane holds up better, but remote-canister designs still struggle. Liquid-fuel stoves (white gas, kerosene) sidestep this entirely.
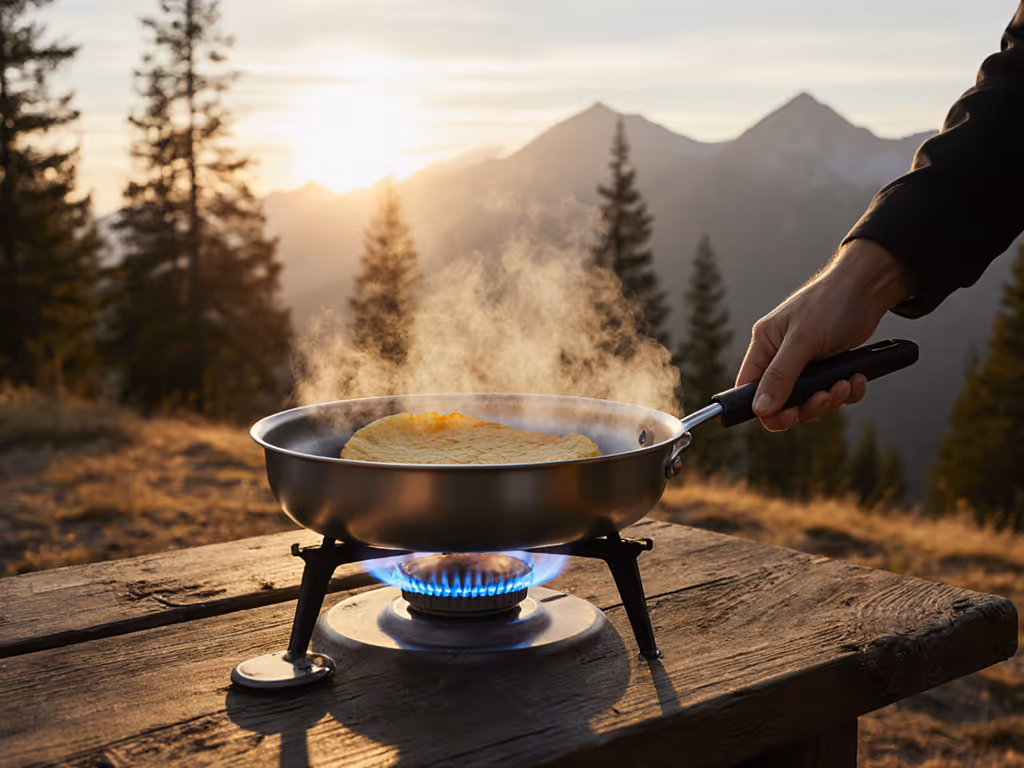
Equipment cool-down: Your pot, mug, dripper, and kettle are heat sinks. A cold ceramic mug plunged into 200°F water cools it to 190°F instantly. A pre-heated vessel keeps that 200°F stable[1]. Winter tests show unpreheated equipment can drop water temperature by 10-15 degrees in the critical first 30 seconds of brewing.
Wind and radiant loss: A 10 mph wind strips heat from your brewing vessel and kettle. Your flame heats the air instead of the water. A 20 mph gust can turn a slow simmer into a dancing, unstable flame (exact temperature control becomes impossible).
The result: you chase temperature instead of holding it. Your coffee under-extracts or over-extracts by accident. Boil times stretch. You burn extra fuel just to reach stable heat.
Comparing Winter Stove Types by Temperature Control
No single stove suits all winter scenarios. The right choice depends on your route, group size, fuel access, and acceptable weight. Here's how they stack up on temperature precision and cold performance:
Integrated Canister Stoves (Butane-Blend)
Temperature behavior: Pressure and output degrade sharply below 50°F. At freezing, a stove rated 10,000 BTU might deliver 6,000.
Simmer control: Poor to mediocre. Integrated piezo igniters often fail when cold; valve adjustments are coarse. Fine temperature tweaks are nearly impossible.
Winter suitability: Marginal for coffee brewing. Acceptable only if your campsite temperatures stay above 40°F and you're boiling, not simmering. Pre-heat your mug aggressively.
Waste/serviceability: Cartridges are single-use. No field maintenance. Piezo igniters cannot be repaired. If ignition fails, you're down to matches or a lighter (and in wet, windy winter, that's a gamble).
Verdict: Skip for serious winter trips. Better for car camping where you can keep canisters in an insulated case and use them sparingly.
Remote-Canister Stoves (Inverted/Butane-Blend)
Temperature behavior: Inverting the canister feeds liquid fuel directly, bypassing some pressure loss. Output is more stable than integrated canisters but still degrades in hard cold. Expect 70-80% of rated BTU at 20°F.
Simmer control: Better than integrated. A remote setup with a needle valve (e.g., a MSR WindPro II-style design) gives you finer heat adjustment. Simmering is achievable but requires focus and slow adjustments.
Winter suitability: Moderate. Good for car-camp winter trips and high-altitude autumn outings where you camp above 35°F. Reliable ignition (usually push-button, not piezo) is a plus. Fuel availability is broad.
Waste/serviceability: Canister disposal is a pain; recycling options vary by region. The burner head can be disassembled and cleaned, but O-rings and seals degrade and are hard to replace in field. Carry spares.
Verdict: A solid middle ground if your winter camps stay mildly cold. Invest in a metal windscreen (not canister-touching) and pre-heat your brewer. Get step-by-step windscreen options and placement tips in our windscreen efficiency guide.
White Gas (Naphtha) Stoves
Temperature behavior: Liquid fuel burns hot and stable across all temperatures. At sea level in subzero camps, a white gas stove delivers consistent BTU and simmer range. Fuel pressure is maintained by a hand pump, not canister pressure. Temperature swing: minimal.
Simmer control: Excellent. A priming cup, burner ring, and needle valve give you granular heat control. You can hold a precise 195°F with practice. Multi-fuel designs (MSR Whisperlite, Optimus Nova) add versatility without sacrificing simmer.
Winter suitability: Excellent for winter backpacking, winter mountaineering, and overlanding in cold climates. Fuel works at -40°F. Regulator freeze is not a concern.
Waste/serviceability: You carry reusable fuel bottles and refill at supply points. Far less packaging waste than canisters. Serviceable: pump leathers, O-rings, jet screens, and burner heads are user-replaceable. A jet tool and basic spares are standard kit. Priming and pressurization require attention and care (not beginner-friendly). Learn safe, reliable stove priming techniques for cold-weather starts.
Verdict: The gold standard for winter coffee brewing. Higher learning curve and more fuel logistics, but unmatched temperature stability and field repairability.
Propane Car-Camp Stoves
Temperature behavior: Propane maintains better pressure than butane even in cold (though still degraded below 0°F). A 1 lb refillable cylinder feeding a two-burner basecamp stove delivers stable, high output.
Simmer control: Excellent. Traditional stove knobs (not piezo igniters) allow smooth, responsive heat adjustment. You can dial in 195°F and hold it.
Winter suitability: Excellent for stationary camps (cabin, RV, car-base camp). Not portable backpacking. Cylinder must stay warm or performance drops; many overlanders insulate cylinders with foam wraps.
Waste/serviceability: Refillable cylinders eliminate single-use waste. Exchange is easy at many service stations. Serviceable burner heads and valves. Long-term, this is the lowest-impact choice for frequent car campers.
Verdict: Ideal for winter car camping and overlanding. Overkill for backpacking; not feasible for technical alpine climbs.
Temperature Precision in Winter Coffee: The Technique
Gear is half the battle. Technique is the other half. Winter coffee brewing demands a disciplined sequence:
Pre-Trip Checklist
- Test your stove and fuel combo at your expected winter temperature (use a freezer if needed). Document boil time and simmer stability.
- Confirm your kettle/brewer fits your pot supports and is stable on uneven ground.
- Verify lighter/ignition works with heavy gloves. Carry a backup (waterproof matches, flint stick).
- Check all O-rings and seals on white-gas stoves. Carry a small repair kit: spare O-rings, jet tool, cotton swabs, and a small bottle of fuel for priming.
- Preheat mugs and brewers by filling with hot water during meal prep the night before, then emptying just before brewing.
Field Brewing Protocol
1. Preheat your vessel and brewer: Never pour cold water from a winter stream into a cold ceramic mug and expect 200°F stability. Heat water, pour it into your mug and dripper, let sit 30 seconds, dump, and refill[1]. This single step is worth a 2-3 minute efficiency gain.
2. Boil to 205°F minimum: In winter wind, aim 2-3°F above your target extraction temperature to account for cooling during pour-over. A cheap dial thermometer clipped to your pot is insurance. Carry a jet tool and a small steel mug for temperature checks.
3. Let water rest before brewing: If you're using white gas, allow a 15-30 second rest after the boil to stabilize flame and water temperature. A jerky, dancing flame is a sign your burner needs attention (carbon buildup, ice on the regulator, or insufficient priming).
4. Pour intentionally: Use a gooseneck kettle or a spout you trust. A wide, chaotic pour cools water by aeration. Slow, controlled pours keep temperature stable and give grounds even wetting[2].
5. Time your brew: For pour-over, aim for 2-4 minutes contact time at 200°F[5]. Cold temperatures do not speed extraction; heat does. A slow, deliberate brew in a preheated dripper beats rushing.
Grind and Roast Adjustments for Winter
- Lighter roasts need slightly higher extraction temperature (202-205°F) because their denser structure resists saturation[2]. In winter camps, where every degree of heat matters, light roasts can be tricky. If your stove struggles to hold 200°F, shift to a medium roast.
- Darker roasts extract quickly; brew them at 195-200°F to avoid over-extraction and bitterness[1]. Winter is ideal for dark roasts: shorter brew window, easier to nail temperature.
- Grind adjustment: A medium grind suits winter brewing better than fine (which can over-extract in hot water) or coarse (which under-extracts in cold). A hand grinder, kept in an insulated bag, grinds faster than your stove boils water.
Fix it, fuel it smart, pack out less (every trip).
That mantra applies to winter coffee. A stove you can service in camp beats a lightweight one that fails halfway through the trip. A grind you can dial in beats a pre-ground bag you're stuck with.
Fuel Calculations and Waste Reduction
Winter boils consume more fuel. Temperature lag, wind loss, and starting from a cold setup add 20-40% extra burn time compared to summer. Plan accordingly:
For white gas: Estimate 1.5-2 oz per person per day for three small boils (coffee, breakfast, dinner) in winter at sea level. At 10,000 ft in subzero, add 30%. Carry a hand-pump fuel bottle (MSR fuel bottle, 0.6 L) and refill at trailheads or supply points. One bottle fuels one stove for 4-5 days. No canisters left behind.
For canister stoves: A 110 g butane-blend cartridge yields ~30-50 minutes of burn depending on temperature and wind. For a week-long winter trip, budget four cartridges and a backup (8 oz total). Organize canister recycling before your trip; know which local facilities accept them. Many outfitters will take empties for free.
For propane basecamp: A 1 lb refillable cylinder ($15-20 to exchange) lasts a couple for 3-4 days of cooking (coffee, breakfast, dinner, snacks). Infinitely refillable, lower cost per use, and far less waste than disposables.
Advanced Setup: Windscreens and Stability
Winter wind is relentless. A windscreen is not optional; it's mandatory for temperature stability. However:
- Do not wrap a windscreen around a canister stove. Canisters vent pressure as they heat; a windscreen traps that heat and can over-pressurize the cartridge, causing failure or rupture. Use an open-sided windscreen that leaves the canister exposed.
- White-gas and propane stoves are safe with full enclosure because fuel is fed by pump pressure, not canister venting. A well-sealed windscreen can cut fuel burn by 30-40%.
- Material: Aluminum foil, thin sheet metal, or purpose-built windscreen kits. Soot buildup is minimal with white gas; clean with a swab after each trip.
When Temperature Precision Fails: Troubleshooting
A stove that won't hold temperature in winter camp is a stove that needs diagnosis:
Symptom: Flame is unstable, dancing, or sputtering.
- Cause: Dirt in the jet, ice on the regulator (canister stoves), or insufficient fuel pressure (white gas).
- Fix: White gas - reprime and check pump pressure. Canister - warm the fuel cartridge gently (hand-cupped, not over flame). If piezo ignition fails, switch to a lighter. Carry a jet tool and clean the burner head over your stove (fuel evaporates quickly and safely).
Symptom: Water takes forever to boil, and simmer is weak.
- Cause: Canister pressure loss in cold, or white-gas stove is under-primed.
- Fix: Canister - move to a warmer microclimate (inside your tent vestibule, if ventilation is safe). Review critical stove CO safety guidelines before operating near enclosed spaces. White gas - add two more pump strokes, wait 10 seconds, and re-light. Document the number of strokes for next time.
Symptom: Boiling water cools too fast when poured.
- Cause: Equipment not preheated; wind acting on water mid-pour.
- Fix: Preheat your brewer with boiling water before brewing. Use a windscreen or pour-over shield to block wind during the pour. Slow your pour speed; rushing air into the grounds cools the water.
Actionable Next Steps
For your next winter trip:
-
Choose your stove based on trip length and temperature: Canister stoves work for mild winter weekends (above 20°F). White gas is the standard for cold-snap backpacking (below 0°F) or multiday alpine trips. Propane is ideal for stationary car camps.
-
Build a fuel and repair kit:
- Fuel bottles or canisters (confirmed working in a freezer test)
- Backup ignition (matches, lighter, flint)
- Jet tool, spare O-rings, cotton swabs (white-gas stove)
- Small thermometer or temperature-reading mug
- Windscreen (open-sided for canisters, full for others)
-
Draft a brew protocol and practice it at home with your exact gear and your winter camp conditions simulated (use a freezer for temperature, a fan for wind).
-
Plan fuel resupply: Identify where you can exchange/refill fuel along your route. Winter outfitters may have limited stock; order ahead.
-
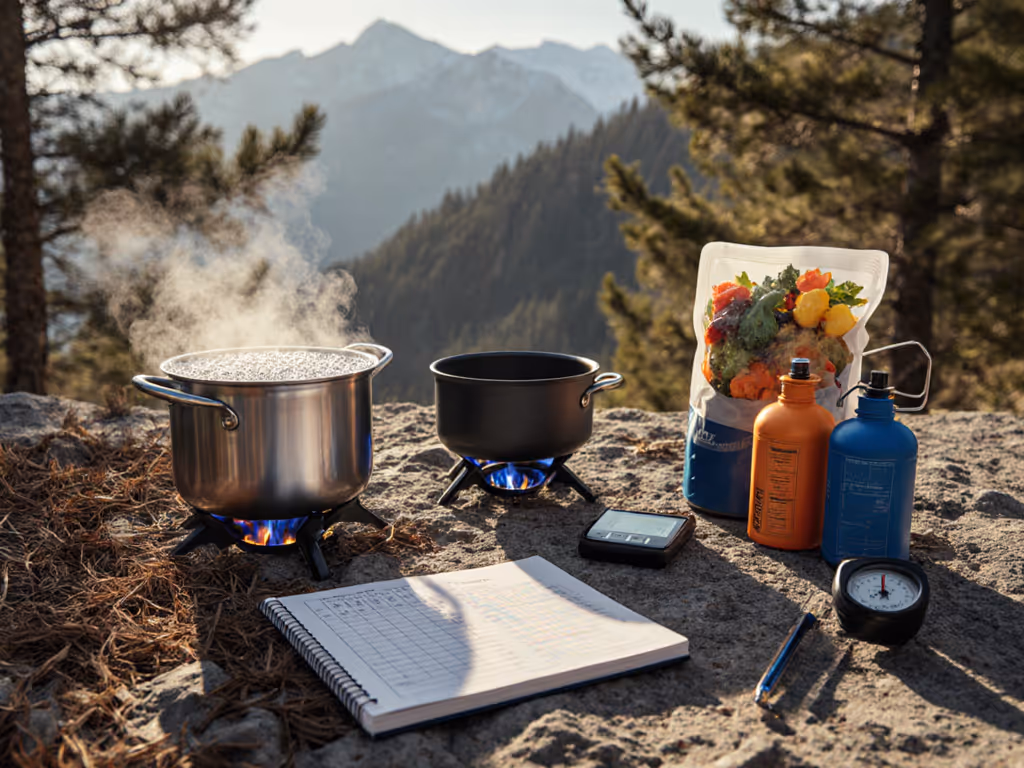
Document your first winter trip: Note boil times, simmer stability, total fuel consumed, and grind/roast adjustments. Use that data to refine next year.
Winter coffee is a small thing (a 6 oz cup in the dark, before everything else). But precision in that cup is what separates a competent winter camp kitchen from chaos. Nail temperature control, carry a jet tool, and you'll sip coffee as steady and balanced as summer. Ignore it, and you'll chase flames and weak, bitter coffee for a week. The difference is the stove you choose, the fuel you trust, and the discipline you bring to the pour.
Related Articles